Monday, February 28, 2011

So Fresh and So Clean

Take a bath, ya hippie! ~Up!


Packing toiletries for hiking Mount Kilimanjaro might have been just as hard as climbing Kili itself. While my tour operator sent me a basic packing list of equipment and clothes, the only toiletries on that list were sunscreen and lip balm. Because a good list is so hard to come across, I want to share what I packed with you because us girls have to stick together when it comes to looking good!

What was the very first thing in my cute Vera Bradley toiletry kit, you ask? A tooth brush and tooth paste, of course. That should be the first thing you pack any time you go on any trip! Other necessities that followed closely after were my brush and hair ties to tame what would become my crazy mane, my favorite Olay Regenerist SPF 15 face lotion, and one of my essentials, Burts Bees Pomegranate Oil Lip Balm. Sun safety is incredibly important so don’t forget you SPF of at least 50!

Now, I hate to be the bearer of bad news but it’s pretty important that you know this: there are no restrooms on Mount Kilimanjaro. The only form of bathroom you will find are rickety wooden outhouses (the fact that these smell so bad you would rather go in the woods is another story for another post). 

No restrooms on Kilimanjaro means two things for you: no toilets and no showers. First, because you will be using out houses or the woods, you absolutely must bring your own roll of toilet paper. Trust me, if you forget anything do not let it be the TP. 

The other implication of no bathrooms on Kili is that there are no showers. Yes, you will not shower for a week. Yes, you will probably smell by the end. Yes, you will agree to never discuss your dirty state with anyone after leaving that mountain.

I wouldn’t have looked half as decent without my Neutrogena Makeup Remover Cleansing Towelettes which kept my face fresh and oil free. If you’re the type of girl that works up a sweat when doing physical activity, Neutrogena Deep Clean Sport On-the-Go Cleansing Wipes would be perfect for you. In addition to working well, both of these wipes come in a re-sealable, plastic package so they don’t dry out and can be easily packed. 

To keep your body clean and to fight off funky smells, Wet Ones wipes are essential. Because they’re made for children, these antibacterial wipes come in both regular and sensitive formula in case you have sensitive skin. Wet Ones will keep your skin clean without drying you out or making you smell like rubbing alcohol.

Dry shampoo like TREsemme Fresh Start is a necessity to keeping your hair clean. Dry shampoo is a powder that absorbs oil and neutralizes odors to keep your hair looking and, more importantly, feeling fresh. Dry shampoo will keep your tresses looking beautiful so that when you look back at pictures on Kili you look like a movie star.

To keep yourself smelling so fresh and so clean, D.O. for the B.O. is a must! Secret Clinical Strength Sport deodorant kept my sweating to a minimum during a highly athletic activity. Do yourself and your trekking group a favor by applying this at least once a day while on Kili.

All of these products will keep you looking beautiful while you conquer the world’s fourth tallest mountain.
My Vera Bradley Toiletry Case

Favorite Olay Regenerist SPF 15 face lotion
The essential Burts Bees Pomegranate Oil Lip Balm-I'm addicted!
Neutrogena Cleansing Face Towelettes to keep your skin clean and glowing


Wet Ones Antibacterial Wipes To Go
Give love to your locks with TREsemme Fresh Start Dry Shampoo
Secret Clinical Strength Deodorant will keep you smelling like roses while you rough it!


Friday, February 25, 2011

These Boots Are Made for Walking

Give a girl the right shoes, and she can conquer the world. ~Marilyn Monroe
 
Want to know what the most important clothing item of your Kilimanjaro adventure is? It’s not a jacket or hiking pants, nor is it what hat you wear. It’s your boots! 

As a shoe fanatic and a shopaholic to boot (pun intended!), this was one to the parts of my trip preparation that I got really excited for. I am not one to pass up an opportunity to buy new shoes, even if they are brown hiking boots instead of cute Lilly Pulitzer sandals, sexy Antonio Melani heels, or my new favorite sparkly pink glitter TOMS.

Choosing the right hiking boot is incredibly important to a successful Kilimanjaro climb. For this purchase, I would recommend going to an outdoors outfitter to seek the advice of a professional.

Several weeks before my trip, I visited REI where I worked with a staff member from the shoe department for over an hour to find the best boot for me. After all, if I was going to wear these things up Kili I needed to make sure they fit well and provided me with the support I needed.

After trying on multiple pairs in multiple sizes and testing them by walking around and climbing on a rock display in the store, I finally had my Cinderella moment. The pair that I choose were Vasque Breeze GTX 7465. What set this hiking boot apart from the rest of the pack? A couple of key characteristics were distinguishing.

This pair is made with Gore-tex fabric so that it’s water resistant. They’re durable boots but it doesn’t feel like I have cinderblocks on my feet when I wear them. Also, they have high ankle support which helps to decrease the pressure on your ankles and the likelihood of rolling them. I have weak ankles so this was particularly important to me. 

Other items I bought to go with my new footwear were support inserts and socks. I bought support inserts because I have especially flat feet and needed the extra support beneath my arches to avoid foot pain as best possible. 

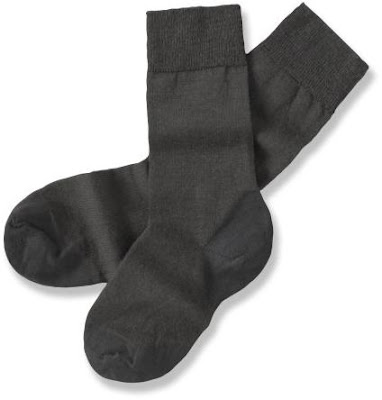
When it comes to socks, there are two types necessary: socks and sock liners. I wore SmartWool hiking socks that are moisture-wicking to keep my feet dry and comfortable in various temperatures. Beneath the SmartWool socks I wouldn’t be caught without anti-microbial wool or silk sock liners. Liners like these ones from REI will prevent any type of fungus, infection, or smell from sustained hiking or outdoors experiences. 

One mistake you do not want to make is neglecting to wear your new boots prior to your hike. Definitely take several weeks to break your boots in so that when it comes time to hike Kilimanjaro you don’t run the risk of blisters. 

Finding the perfect pair of kicks takes some time, but having the right pair on your feet for Kilimanjaro is worth it. Good luck, Cinderella!
My Vasque Breeze GTX 7465 hiking boots-wish they came in pink!

SmartWool hiking socks
Anti-microbial sock liners
My favorite Glitter Pink TOMS: they're cute & for a cause!


Adorable Lilly Pulitzer McKim Wedges in Gold I want!
Cinderella is my favorite Disney princess


Thursday, February 24, 2011

All About Outwear

Fashions fade, style is eternal. ~Yves Saint Laurent

Now that your backpack is half full of your tops, bottoms, and undergarments, you still need to squeeze in outwear. As I said in the previous post, layering is key. Because you go through several different climates while hiking Kilimanjaro (previous post on weather), you need to prepare yourself clothing wise so that you’re comfortable and prepared for all types of weather.

The first jacket I layered with was my favorite Northface black fleece zip up priced at $80. I bought mine on clearance from REI so I got a great deal on it. Want the look for less? Target sells a black zip up Champion jacket that isn’t fleece but a softshell material. I would definitely recommend having a fleece jacket to keep you warm when temperatures drop at night and at higher altitudes.

In addition to all of my layers of shirts and my fleece jacket, I wore my favorite pink Northface rain jacket. Although it didn’t rain on my hike, I wore this jacket everyday because it’s lightweight so it layers well and because it’s a good windbreaker for when it gets gusty on the mountain. The Northface Women’s Venture rain jacket comes in almost twenty colors and is $99 which is pretty pricey, but it’s a good investment for college girls or working women who are often walking through campus or the city. Want the look for less? This Columbia rain jacket is a good alternative and although it only comes in four colors, it’s only $60. Want the look for even less than that? This Kelty rain jacket, available at Target, is a cute periwinkle color and a steal at $35. I might recommend going with the Northface or Columbia rain jackets as they are meant to stand up to the harsh weather of the outdoors when hiking or camping specifically.

If you’re like me, you probably hate it most when your hands and feet are chilly. In order to keeps my hands nice and toasty, I wore my Northface Denali Thermal Gloves. They’re relatively inexpensive at $30 and the fuzzy material is super comfortable in winter weather.

Now, we can’t forget about covering up your ears and head! I wore a TurtleFur fleece headband to keep my ears covered. 

I also wore my favorite University of South Carolina baseball cap everyday to show my love for the Gamecocks. As a girl, a baseball cap will be your best friend on your Kilimanjaro hike because as the week goes on and your hair gets dirtier and more tangled, a hat becomes the only way to control it. Plus, you don’t want to look back at pictures of your hike up Kilimanjaro and decide not to frame them because your hair looks too messy or greasy. Do yourself a favor and buy a cute and comfortable hat to cover up the bird’s nest your hair will become so you will still look adorable in your photos. 

One type of hat I didn’t bring but wish I would have is a fleece beanie. This would have been especially good to have on summit night when it is freezing cold outside and at night while sleeping since wearing a baseball cap to bed is awkward.

Want to know what kind of kicks you need to climb Kilimanjaro? Read tomorrow’s post to find out what type of boots you need to get your booty to the summit!

Warm and comfy Northface Women's TKA 200 Kimber Full Zip

My favorite pink Northface rain jacket

Super soft Northface Denali Thermal Gloves

Turtle Fur Fleece Headband to keep my ears toasty

My favorite USC hat to cover up my crazy hair and show some Gamecock pride

Wednesday, February 23, 2011

So Many Outifts, So Little Packing Space

Fashion is not something that exists in dresses only. Fashion is in the sky, in the street, fashion has to do with ideas, the way we live, what is happening. ~Coco Chanel

Every girls’ favorite part of going on a trip is of course, choosing outfits. My travel/clothing philosophy is do not pack anything you don’t want to be photographed in. On travel adventures, you’re going to take hundreds of photos in gorgeous places. You don’t want to look back at those photos later and cringe at your outfit and leave those pictures in a digital archive collecting digital dust forever. 

Travel photos are some of your best memories and deserve to be printed out and framed to be shared with friends and family! You want to look your best in your travel pictures, right? If yes, then half the battle is packing the right clothing.

When I pack for my travels, I try and strike a combination of cute and comfortable. The clothing you pack should be aligned with what activities you’ll be partaking in on your trip. Obviously, you wouldn’t bring a bikini to Alaska, and I certainly didn’t bring my sexiest stilettos to hike Mount Kilimanjaro. What I did bring was cute and functional clothing that I could layer. Layering is the best tip I can offer you about clothing!

In terms of tops, I brought two workout tank tops that were made of stretch fabric and were moisture-wicking. Target has two fun work out tanks that are Champion, one pink   and one blue. Over the moisture-wicking work out tanks, I wore both long and short sleeve t-shirts I already owned. My favorite one was of course my USC shirt that I wore to the summit because I couldn’t possibly hike Kili without representing my Gamecocks! I also wore a lightweight blue cotton pullover that could zip down several inches in the front. A great alternative Target sells is this adorable pink Champion cardio jacket.
I am sad to say that while I kept my tops and outwear relatively cute, I unfortunately failed to find a truly flattering and fun pair of hiking pants. Unfortunately, Lilly Pulitzer doesn’t sell hiking clothing yet, so until then I’ll stick with my Northface pants. I bought two pairs, one khaki and one black, that were able to zip off into shorts if it was hot out. In retrospect I probably could have gotten by with only one pair of pants, but it’s always good to be prepared with a spare pair in case of rain or mud. If you’re like me and are cold all the time, you will absolutely need long underwear to wear beneath your pants when you reach those higher altitudes where the temperature drops. Many outdoors outfitters like Dick’s Sporting Goods or REI offer their own pairs such as this REI pair. I hiked with a pair of Hot Chillys on to stay as warm as possible. I also packed my favorite Nike running shorts to wear in the tent and on the first and last days as we hiked through the rain forest. Though they’re $30, they’re a staple item in a college girl’s closet and they’re great for working out or running errands.
As far as undergarments go, I am sad to say I definitely was not wearing my cutest bra or pair of underwear. When hiking, your underwear must be all about function. I wore Champion sports bras that are inexpensive at only $17 and can be found at Target. For underwear, I’d recommend buying underwear specific for hiking that is a blend of nylon and spandex, is easily washable, and is antimicrobial. ExOfficio makes bikini briefs priced at $16 and while they aren’t as cute as some Victoria’s Secret Pink underwear, they have the necessary characteristics and will do the job. Because nights on Kilimanjaro can get pretty chilly, I wore my favorite Victoria's Secret sweat pants to sleep in and a comfy, long sleeve t-shirt.

Want to know what types of outerwear to pack? Read tomorrow's post to find out! 

C9 Champion Everyday Tank with Bra in Boardwalk Blue available at Target
C9 Champion Everyday Tank with Bra in Katydid Pink available at Target
C9 Champion Long and Lean Fit Tee in Scream Green available at Target

C9 Champion Women's Cardio Jacket in Katydid Pink available at Target
Northface Women's Paramount Peak Convertible Pant in black

Northface Women's Paramount Peak Convertible Pant in khaki
Cute Pink Hot Chillys Long Underwear
My favorite Nike running shorts

C9 Champion Women's Seamless Racerback Bra in purple available at Target
My favorite comfy Victoria's Secret Pink sweatpants

Tuesday, February 22, 2011

Backpack, Backpack!

Why buy good luggage? You only use it when you travel. ~Yogi Berra
 
Here’s a riddle: What weights several pounds when empty, feels like a million pounds when full, has many compartments filled with valuable items, and is a necessity for hiking Kili? Your backpack! 

When trekking Kilimanjaro you will actually have two backpacks: one day pack that you carry filled with only necessities, and a backpacking pack filled with your supplies for the week to be carried by a porter. In future posts I will be sure to cover what items go in which pack.

I was fortunate that I didn’t have to shop for either of these items because my family already owned them. Because my brother is an Eagle Scout and my dad was incredibly involved with the scouts, they had many of the items I needed including both types of backpacks. Thank goodness a scout is always prepared!

For my day pack, I carried a blue, large-size Camelbak backpack. Though the Camelbak had a water pouch, I never used it on the trip because I didn’t know if there was an adequate way to clean it while also having to use purification tablets. I simply stuck to filling and refilling my pink Camelbak water bottle. Large Camelbak Backpacks for outdoors range from $65 to $125, so they can be pretty expensive. If you’re okay with using a water bottle as your hydration source, I would recommend just buying the Camelbak reusable water bottle and purchasing a general outdoors/daily backpack.

Because I didn’t use the water pouch inside the backpack, I probably could have used my trusty Northface Recon backpack that I use every day when going to class. The Northface Recon backpack is pricey at $90, however it’s great for daily use when going to class or work and it definitely is made to last. This backpack has survived almost four years of college with me! Other Northface backpacks are priced as low as $55 and come in some adorable colors as well.


Whatever backpack you decide to use as your day pack, make sure it has cushioned straps and cushion on the back. You are going to be carrying this for many hours each day every day for a week, therefore it's super important that it feels comfortable. 

For my hiking backpack, I used a Kelty external frame pack. Because a porter will be carrying this pack, almost all tour operators require you to use a backpacking pack or a frame backpack and absolutely no hard case luggage. 

One backpack accessory you can’t do without is a backpack rain cover. While $35 seems like a lot to spend just in case it rains, you will thank yourself for spending that money when your clothing and supplies aren’t sopping wet.

If you’re not an avid hiker and don’t necessarily want to spend the money on new backpacks, ask around to family, friends, and coworkers to see if you can borrow them from anyone. I’m sure they will trade you some delicious home-baked sweets for a week and a half of backpack use-this way everyone wins!
Side view of the day backpack I used for Kili-note the cute "A" luggage tag!
Back view of my day pack-lots of cushion is key.

My everyday backpack that would have also been great for Kili! Love this!

Monday, February 21, 2011

Must Have Equipment

Travel is glamorous only in retrospect. ~Paul Theroux

Now that you’re physically, medically, and mentally ready for you Kilimanjaro hike, it’s time to get prepared in terms of your equipment. Some tour operators for Kilimanjaro treks will have the equipment necessary available to rent. Sometimes your guide will secure equipment if you let them know in advance what items you’d like to rent. Like me, I’m sure you want pack as light as possible and not be bogged down with a ton of gear. Take advantage of renting equipment from your tour operator or guide so you don’t end up paying hundreds of dollars in checked baggage fees from your airlines. 

Wondering what types of equipment you should rent from a tour operator? Bulky items such as tents and portable dining table and chairs should be included in the cost of your trek paid to the tour operator, so no need to worry about renting these items.

Although I brought my own sleeping bag (more on which type next post!), I would absolutely rent a sleeping pad from your tour operator. Trust me, if you’re taking a route where tent camping is the accommodation, the deeper sleep you will have and the back pain you will save yourself will make you really thankful for renting a sleeping pad! 

One item I didn’t give much thought to renting until I got to the base of Kilimanjaro was gaiters. Gaiters are protective covers that zip on over the bottom of your pant legs and the tops of your shoes. Why are gaiters a good idea, you ask? They’re important because first day of your hike you will be trekking through the rainforest portion of Kilimanjaro. Mud in your boots is the last thing you want, especially not on the first day of your hike. Gaiters will help keep the mud out of your boots and keep your pant legs clean.

One item that is absolutely necessary for trekking Kilimanjaro is a walking pole. Are you an experienced hiker? If so, then you might already have a walking pole or you might want to invest in purchasing one. Is this your first big hiking trip? If yes, renting a walking pole is probably a better option for you. A walking pole will help give you support on trek, especially coming down the mountain which a lot of people under estimate. Your knees will be thanking you if you carry a walking pole for support!

Read tomorrow’s post to learn what other gear is necessary for your hike!

My sleeping pad was a simple foam one like this. If you're a frequent camper, maybe splurge on an inflatable one!

Gaiters like this keep your shoes and pants clean and dry.

Walking poles like these will save your joints and knees a lot of pain and stress!


Friday, February 18, 2011

It's Just Emotion Taking Me Over

"Traveling tends to magnify all human emotions." ~Peter Hoeg

Now that I was finally financially informed, getting into shape physically, medically prepared, and had picked a route and time of year to hike Kilimanjaro, I figured that all I had left to do is pack my bag and get on the plane. While this assumption wasn’t too far off, I was definitely missed one key step.

If you’re wondering what step I missed so that you don’t miss it, you’re in luck. As the point of this blog is to get you as prepared as possible for your Kilimanjaro adventure, I want to give you as much relevant information about my experience as I can. If I had a re-do for this trip, the one step I wouldn’t miss the second time around is preparing myself mentally and emotionally.

Most sources about trekking Kilimanjaro forget to tell you that while physically preparing is incredibly important, mentally preparing yourself is just as essential. 

On my hike, I experienced periods of intense emotional highs and lows unlike any other time in my life. During hours long treks that seemed unending, my mind reeled with boredom and lacked the motivational thoughts I needed to keep going. When I wasn’t sure I was going to reach the summit due to onset hypothermia (more on that in future posts!), I felt devastated and depressed unlike ever before. Upon reaching Uhuru Peak I was so elated, ecstatic, euphoric; it was the highest high, my proudest moment.

To an extent, the only thing that can truly prepare you for the emotional roller coaster you will ride is actually hiking Kilimanjaro. However, there are a few things you can do to ready your mind. Be excited. Be pumped up. Be thrilled for the adventure of a lifetime you’re about to have. Be wary of the journey ahead of you too. Be mindful of the challenges you will endure. Be aware that your journey will not be easy nor without obstacles. 

Expect to be frustrated. Expect to be frustrated with boredom. Expect to be frustrated by the people you are trekking with. Expect to be frustrated with your physical limitations as the human body can only be pushed so hard. Expect to laugh. Expect to laugh at your shortcomings. Expect to laugh when you falter. Expect to laugh with you new trekking friends over silly jokes and stories. Expect to laugh at Uhuru Peak while popping celebratory champagne and snapping photos of the most authentic smiles you’ve ever seen. Expect to laugh when all is said and done and there is nothing to do but laugh. Expect to cry. Expect to cry from disappointment. Expect to cry from pure bliss. Expect to cry because you’re overwhelmed with emotion. Expect to cry when the adventure is over and you step onto the plane to leave. 

More than anything, expect to feel more proud of yourself than you have ever felt in your whole life. Expect a sense of internal fulfillment and happiness that no one can ever take away from you. Expect all of these emotions and more, and you will be well on your way to being totally prepared for your Kilimanjaro adventure!

Thursday, February 17, 2011

A Pill a Day Keeps Altitude Sickness Away

Medicine heals doubts as well as diseases.  ~Karl Marx

I thought that after I got my general Tanzania vaccinations I would be good to go for hiking Kilimanjaro. Wrong! There were still a few things I needed to do to prepare myself medically.

Attitude sickness can be a hiker’s worst nightmare. Altitude sickness is a major contributor to preventing 50% of hikers from reaching Gilman’s Point (18,600 feet) which is less than an hour from the summit. It’s also a reason why only roughly 40% of hikers make it to Uhuru Peak (19,334 feet). Because altitude sickness can prevent you from reaching your ultimate goal of the summit it needs to be taken seriously and prepared for.

Symptoms of AMS (acute mountain sickness) include headache, nausea, dizziness, fatigue, shortness of breath, loss of appetite, disturbed sleep, and general discomfort. Altitude sickness especially affects those who are pregnant, have cardiac or lung disease, or ocular or neurological conditions. Be extra careful if you qualify for one of these characteristics! Learn more about causes, symptoms, and treatments at U.S. National Library of Medicine's page on AMS.

Looking for a recommendation on a type of medication to lessen the symptoms of AMS? I wouldn’t be caught on Mount Kilimanjaro without Diamox (pharmacological name: Acetazolamide). Diamox is a diuretic, sulfa drug that accelerates acclimatization. While most people don’t start to experience symptoms of altitude sickness until they reach 10,000 feet, I took my doctor’s recommendation and started taking Diamox the first day of the hike so I could get it into my system and let my body could adjust to it.
To learn more about Diamox, visit U.S. National Library of Medicine and WebMD.
If you want to stay safe, one other medical necessity is ensuring that you’re drinking clean water. Because the water you drink on Kilimanjaro is mainly collected for the freshwater sources on the mountain, it’s absolutely necessary to purify the water. Hand powered purification pumps are on the expensive side, so I opted to use Katadyn Micropur Purification Tablets which I purchased at REI. These tablets will destroy bacteria, viruses, as well as other impurities. 

Do you cringe when you accidentally swallow pool water? Because chlorine is the active ingredient in the purification tablets, the taste of the water is less than desirable. One of the best tricks I can offer you to covering up the chlorine taste is by adding Crystal Lite On-the-Go packets to give the water a delicious flavor. Fruit punch and lemonade were my flavors of choice, but Cranberry Apple and Strawberry Orange Banana sound tasty as well!

Want to know if I experienced symptoms of altitude sickness on my Kilimanjaro adventure? Read future posts to find out!


Diamox Tablets to treat symptoms of altitude sickness

Yummy Crystal Life On-the-Go Packets

My favorite water bottle that I carried all the way up Kili! It's cute & eco-friendly!


Wednesday, February 16, 2011

Shots, Shots, Shots, Shots, Shots, Shots...Everybody!

If you are too smart to pay the doctor, you had better be too smart to get ill.  ~African Proverb

So I’m guessing that you, like most other people, don’t enjoy gets shots at the doctor. Let’s face it, getting shots is not a fun activity. Just the anticipation of getting shots is painful in and of itself. Because nobody enjoys this part of traveling, I’ll make this post as painless and simple as possible!

I went to our on campus health center eight weeks prior to departure to get my medical clearance. I was fortunate that my university’s health center has a travel clinic in it specifically for students traveling abroad. Most universities probably offer travel vaccinations, however not all doctors’ offices are familiar with these special vaccinations.

Are you planning on visiting your general physician for travel vaccinations? If so, make your appointment well in advance of when you actually need to have the vaccinations by. Your doctor’s office may have to special order certain vaccinations or they might refer you to a clinic specifically geared toward travel to obtain the proper immunizations.

Upon going to the my university’s travel clinic, they informed me that I had the majority of the vaccinations I needed which included Hepatitis A, Hepatitis B, Polio Booster, and Meningococcal Meningitis (which most colleges require to enroll). Seasonal flu vaccinations are suggested and a Rabies vaccination is recommended if you will be in the Tanzania for an extended period of time, but I opted out of these two as per my professor’s recommendation. I did, however, still need Typhoid and Yellow Fever vaccinations as the Yellow Fever immunization is required for entrance into most sub-Saharan African countries, including Tanzania. 

Having had friends who received these vaccinations recently for study abroad trips, I knew ahead of time that they were going to hurt and I was going to be sore. The nurse did one shot in each arm. When she said to me “There, that wasn’t so bad,” I smiled politely at her and said I was fine even though I wanted to yell, “How do you think that felt?! OF COURSE IT HURT!”

For the next three days both of my arms felt so sore that you would have thought I had been hitting the gym nonstop and bench pressing small children. My roommates got a kick out of having to get things off higher shelves for me because I couldn’t lift my arms up as high as normal. At least someone got a laugh out of it! 

Aside from the Yellow Fever and Typhoid vaccinations, the other major medical preparation you need for Tanzania (and most African countries) is to obtain Malaria medication. Your general physician or a travel clinic physician can write you a prescription for this but again, make sure you obtain this well in advance of your departure. There are different types of Malaria tablets, some of which you take daily, some only once a week. There are side affects to Malaria medication so be sure to review those with your physician. 

Malarone, which is what most people on my study abroad trip took, is a popular Malaria medication that you take daily. Mefloquine (also called Larium), which is what I took, is a once a week pill. It made me nauseous on the days I took it because it is a strong dose of medicine, however I appreciated not having to remember to take it every day. Trust me; this is not medication that you want to forget because your Malaria exposure is high in Tanzania.  Mosquitoes are carriers so be sure to pack strong bug spray (more on this in future posts). You can also contract Malaria by drinking the water which is why you should only drink bottled water! 

Follow these links to the CDC website to learn more about vaccinations and risks associated with Yellow Fever, Typhoid, and Malaria.


Yellow Fever Endemic zones in Africa 2009, Credit: CDC
Malaria Endemic Countries in Eastern Hemisphere, Credit: CDC
 

Mefloquine Malaria Medication

Tuesday, February 15, 2011

Let's Get Physical, Physical!

We’re working, we’re moving, we’re in the zone, we’re grooving! ~Monica from “Friends”

Happy Tuesday!

Now that you know me a little better, you know that I’m all about over-planning and having a back up plan for my back up plan. Well, I have a confession to make. If there is one area of my Kilimanjaro adventure that I felt under prepared for it was the physical aspect. 

As a younger woman of relatively good health with the exception of a bad ankle, I make it a point to eat healthy and get regular exercise. However, in the year leading up to my Kilimanjaro trek I went through a fair amount of health problems. Over roughly ten months time, I was ill with nine or so upper respiratory infections which through several doctors and multiple tests was determined to be the result of living in my apartment (a hundred year old renovated cotton mill).

Constantly having upper respiratory infections made it really difficult to be physically prepared for the trek up Mount Kilimanjaro. Nevertheless, I made an effort to start training as soon as I knew for certain I was going to climb, which was three and a half months before the hike. Starting to actively train for hiking Kilimanjaro as soon as you decide to go is key to your successful summit!

My training consisted of spending at least an hour on the treadmill four times per week. I would set the treadmill to its maximum incline capability and to a moderate walking speed to simulate walking up hill. Also 3 times a week I would weight train to strengthen my muscles. Using light weights, usually 7.5 or 10 pounds, I targeted my arm muscles and leg muscles. Squats and lunges with kick backs strengthened and toned my legs which helped with the hike and got me looking good for spring break I might add! 

One of the ways I wish I would have trained most is by taking a weekend hiking trip. By picking a mountain range at a higher elevation to hike for the weekend, you give your body the opportunity to adjust to exercising at a high altitude. You also give yourself a chance to see if you will experience altitude sickness (I will cover this in future posts!). 

Are you an exercise junkie? If so then this regime will probably seem a little relaxed to you. Feel free to add in more rigorous cardio activities like running or cycling or weight training with heavier weights. Would you rather be a million other places than hitting the gym? If so then start slow and don’t overdo it. Gradually build up your workout routine over time and before you know it you’ll be running just as fast or lifting just as much weight as those exercise junkies out there. Don't forget your cute clothes to make working out fun!

Love my Reebok Easytones!

Lilly Pulitzer now carries workout wear-I am dying for this outfit!
'

Monday, February 14, 2011

Rain, Rain, Go Away!

There’s a 40% chance it’s already raining [as she stands in a downpour]. ~Mean Girls

Does preparing for the unpredictable seem impossible? Well that’s just what you have to do because on this trek you will experience many ecological zones and go from equator-like weather to what seems like Antarctic weather in a matter of mere days. You will climb below through, and above clouds, in tropical sun, rain and snow, through a forest, across a desert and finally on ice fields to the summit. As the weather is unpredictable overall, you will need to be prepared for wet days and freezing cold nights.

Are you the kind of girl who dreads going to class or work on a day that it’s pouring rain? On a dreary and humid day do you worry about your hair frizzing to the size of Texas? While I reluctantly face the rain on my way to class by wearing my bright pink rain jacket, I definitely would rather stay curled up in my warm bed than venture into downpours. 

If you’re like me, the idea of hiking Mount Kilimanjaro in rain showers is less that appealing. Therefore, it’s really important to choose the time of year that the weather is ideal for yourself.  There are two rainy seasons on Mount Kilimanjaro, from March to May and again from November to January. Hiking during the rainy season will definitely make for not as crisp and picturesque photos, and potentially a more difficult trek due to hiking through the mud initially and misty or snowy conditions later.

Not a fan of cold temperatures? This may not be a problem at the beginning of the hike where temperatures are on average 70 to 80 degrees Fahrenheit during the day. However, prepare to bundle up at the summit at night time where the temperature becomes chilly ranging from -15 to 0 degrees Fahrenheit. As your hike to the summit takes place in the middle of the night (more on that later!), you will need to prepare yourself for brisk weather. And by brisk I mean brutally cold weather that is more frigid than the mean girls in from your high school years or your icy mother in law.

One of the best times to climb the mountain is during the dry season from June to October. Though it is the coldest time, this is the most popular time to go. The warmest months of January through March are the second most popular time. January, February, and September are said to be the best months for climbing due to little rain, warmer temperatures, and their overall ideal weather conditions. 

I trekked Kilimanjaro during the month of June. To learn more about the weather during my hike, read future posts about my trip!

*Thanks to my roommate & best friend Katie for today's quote inspiration! You rock!

My favorite pink Northface rain jacket I wore up Kilimanjaro


P.S. Happy Valentines Day loves! Have a wonderful day celebrating love with family and friends!